12.11.2012

Dec {mini} pages


Left page:  3 mini instagram photos of decor, a friend's baby shower and a huge Santa figure
The journal card from Katie Pertiet at Designer Digitals
I journaled about the day's events on the back and attached with staples.
For the background I used a free png download from Ali Edwards that I changed to a gray shade and printed on vellum from her Christmas Cheer post here {love that movie too!}
Ornament stamps from Papertrey Ink Winterberry collection 

Right page:  Paper from Simple Stories Handmade Holiday collection
Stamped tag from CTMH Cherish the Day stamp set, added baker's twine
The journaling for this day will be on the tab insert in the pocket (created from the opening of the paper bag)


Really enjoying the simplicity of this project & actually able to keep up with it!  More to come...


12.02.2012

Dec {mini} album Details


Like I said in my previous post, to capture December I decided to try a paper bag album for the first time.  I thought something small will make it easier to keep up with adding photos and stories throughout the busy holiday season.

I started with 3 regular sized lunch bags.  Before I attached them together, I added some inking by using a pencil eraser to make some white dots, then also added some cardstock to various pages to give it more stability. 

I also decorated the cover with some paper from Simple Stories Homemade Holiday collection, added some washi tape (Recollections brand from Michaels) & more stamping.  I layered the bags in every other direction, folded them evenly, then stapled it together.  I cut a piece of felt using a scalloped die to cover up the staples on the binding, which I attached with glue dots. 

I've somewhat planned out what specific dates I want to record, so I started the first few with that in mind.  The first page is reserved for December 1st, including some holiday decorating, then the next pages will be to record a visit to see Santa with my nephew. 

For the insert pages to put in the pockets created by the bags, I cut kraft & red cardstock, embellished with ink or washi tape, then added a felt tab (diecut using Nestabilities) and stapled with Tim Holtz's tiny attacher.

I prepped some supplies to have ready as I go, and keep it in my little "hope" plate nearby.  

From the top left, clockwise: labels & scalloped circles cut from kraft cardstock using Nestabilities dies, flocked punched designs, various Studio G xmas stamps, Simple Stories Handmade Holiday collection & 2 sheets of paper from BasicGrey Clippings Collection, punched stars added white ink using Papertrey Ink's Star Prints stamp set, CTMH Cherish the Day stamp set with several December images stamped in different colors and cut different ways to resemble tags, tickets, etc.

Here are the flocked snowmen.  And using a piece of paper from the SS Handmade Holiday collection, I can cut out the different text & images that were on a single sheet.

I still need to print the journaling cards from Kaite Pertiet to have handy, then hopefully it will be all about the photos & stories that happen this holiday season.

Happy December!


11.30.2012

Countdown to Christmas


 Christmastime is here again...I can't believe I am saying that on November 30th!  It seems to have arrived earlier this year with the Thanksgiving holiday falling earlier in November.  I always start off festive early in the month and by the time the 25th gets here I'm ready to see it off & head for the new year!  
In order to not lose track of those important stories and holiday traditions I made a mini album.  The layout will be somewhat like the #DecemberDaily, but not everyday. I have never tried a paper bag album, and since I love the combo of kraft/white/red for the holidays I thought this would work perfect.  The mini size is more manageable for me to actually get a few instax & Instagram photos printed and keep up with it during the busy holiday season.  I have a few dates in mind to highlight like a visit to Santa with my nephew and something special for 12/12/12!  Also a page reserved for when I visit NYC to see the Rockettes Christmas show!  Then of course the important dates like the 24th & 25th!


I prepped as much as I could, using my favorite elements and supplies, while also building a little stash to embellish as I go.  I will highlight the details in another post, but for now, Happy Scrapping this December!

Inspiration/Supplies:

December Daily on Ali Edward's blog


Journal spots by Katie Pertiet at Designer Digitals

Paper bag album inspiration from Melissa Goodsell

Simple Stories Handmade Holiday Collection

10.25.2012

Photoperiodism


Photoperiodism: the mechanism by which many of our hardwood trees regulate their various life processes, including preparing for winter.

aka....the leaves change colors.  And ironically, this is the time of year I seem to go through my own photoperiodism.  The change of season always provokes a reflection and quest for change within me, as well as looking back on the entire year, and thinking of what's to come in the next one.

Right now...

i am loving organizing, fall cleaning, moving around scrapbook storage, adding some new items, layouts with one big picture & a few smaller ones, {really loving one big picture to tell a story} transparencies/vellum overlays, using song lyrics for journaling

i am wanting to catch up on a few unfinished summer layouts, keep up to date with what’s going on now and get ready for the holiday season

i am thinking about 2013, the possibilities, what my one little word will be, what new ventures a new year will bring

i am yearning for change, reinvention, metamorphosis {i like change}

i am working on a strategy for next year’s scrapbooking everyday things, mastering my manual photography techniques, improving time management {as always}

i am surprised by how i am getting better & quicker with my manual settings, how tall & grown-up my nephew is getting

i am trying to be thankful everyday, enjoy the little things, do more for the ones I love, be happy with everything i have right now in the moment and not worry to much about the rest

i am worrying about how I will get it all done!, people who I know are suffering or dealing with hard times, the state of our nation & its future

i am remembering fall seasons' past, reflecting on my life, loved ones who are far away or no longer here


Check out this post by Cathy Zielske Taking the crap out of scrapbooking --a motto I can relate to & something to think about.


Santé


10.02.2012

DIY Stamped Background: Cards


This project has been on my mind for some time and I finally got around to getting it together.  My first loves are scrapbooking & photography, but card making is just too practical to pass up with all of my supplies.  A few issues I run into with making cards:
  • Not enough Birthday cards on hand
  • Not enough masculine cards
  • Cards that are too embellishment heavy (& too expensive to mail)
  • Stamps I want to use but can't figure out how

8.20.2012

Smash // ^Cycle


I love to Recycle, Reuse or the new *buzz word*, Up-Cycle.  One time I read that only 15% of people recycle & I was shocked since it seems to be a simple way to help the environment.  

Here is my quick ^Cycle of a invoice envelope from a DSW order (how fabulous is that? New shoes & a chance to Smash?!)  

I am finding a lot of online stores are using cute & handy pockets for their invoices, another one I noticed was Vera Bradley, which has very sturdy, white pockets.

Anyhooo....

So I just wanted to Smash this quick page of my handsome guy, looking dapper with his suit+flip-flops=gotta love beach weddings.  

I simply just turned the pocket over and used it as a border/background for the photo.  In the pocket I slid a 4x6 piece from Simple Stories Documented collection.  On the back of the card I journaled some loving thoughts,  then attached the ribbon tab with the tiny attacher.

Added some embellishments & wahlaa!  Barely took 15 minutes, my kind of project!

Smashing is a raw, creative outlet...I enjoy it thoroughly!


8.14.2012

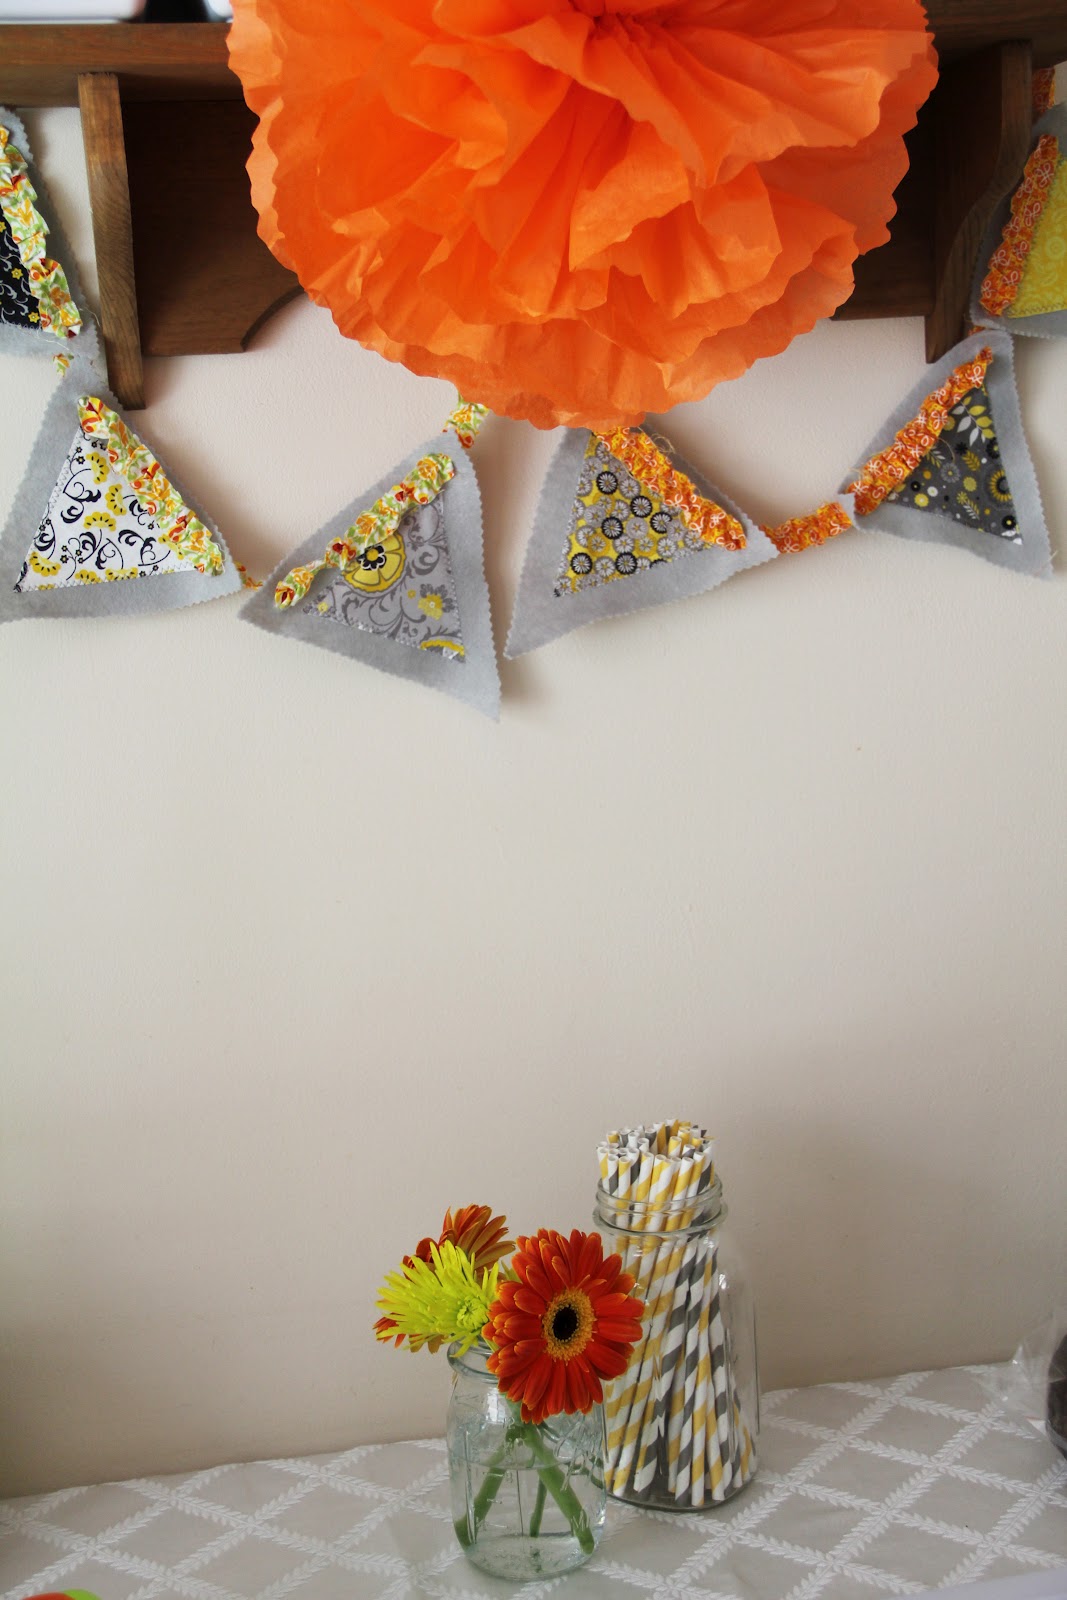
Felt Banner


For my party, I wanted some personal touches that reflect my personality to be in the decor.  I decided to sew a felt banner to drape around the dining room and add some color.

My colors revolved around citrus tones against a gray backdrop, I just love gray.  So I chose a gray felt and happened to find these pre-cut quilting triangles and hexagons in the clearance section at Joanns.  I have been obsessing over hexagons lately, loving the structured shapes and working with them.  
       

So I basically just laid the shapes onto the fabric and cut around it with pinking shears.  I then sewed the quilted pieces to the felt.  This may sound time consuming, but it was pretty quick with the straight lines and not being extremely precise with it.
For some of the banners I had completely cut out the felt shape as well, so I had to connect them somehow.  I found fabric trim in accent colors in the clearance section as well and just punched holes in the corners with a crop-a-dile, then threaded the trim through.  Some of the other banners I cut out together so I linked the pieces with decorative brads.  It worked.

I draped the banners around the main dining area and for decorative accents. 
I also used it as part of the decorative backdrop in the photo booth.
Props via ohhappyday {cute blog}
I love the look & had fun putting it together!  These can easily be reused for other parties or just for room decorations.  They would actually be cute in a baby or kid's room.  I am thinking of making them to sell in the future....we'll see!  

Stay tuned.